What's new in Book Connect?
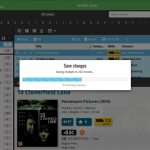
In today’s update, we improved the behaviour after searching using the search box top right.
Previously, when you selected a book from the “suggestions dropdown”, the software would take you to a separate full screen page showing the details of that book. This behaviour was a bit annoying as it would take you away from the main screen and you needed to click “Back” on the top left to get back to it. Also, the main screen would then show you the full collection again and would be scrolled back at the top again. Meh..
Read more
 A big update for your Book Connect web-based software today, which is all about pick list fields.
Pick list fields (and the pick lists behind them) are an important part of your book database. These are the fields in the Edit screen that let you pick from a list of possible values, with that list being fully configurable by you the user.
Examples of pick list fields are Location, Owner, Format, Genres and Subjects (both multi value pick list fields), but also Author, Publisher and Series.
Now, a lot of the questions we usually get about Book Connect are related to pick list fields and can usually be answered with:
“Just use the Manage Pick Lists screen”
Renaming Locations, Merging duplicate Authors, fixing author sort problems, fixing typos in author names, etc… it is all done in the Manage Pick Lists (MPL) screen. An important and powerful screen, but… not so easy to find if you don’t know where to look or don’t even know what to look for.
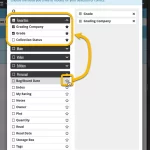
With today’s Connect update, we are making this a lot easier: We have improved the Manage Pick Lists screen itself AND made it more accessible / discoverable:
In short:
- Improved Manage Pick Lists (MPL) screen
- Easy access to the MPL screen right from the folder panel
- Refreshed Edit Comic screen, with better pick list fields and direct MPL access
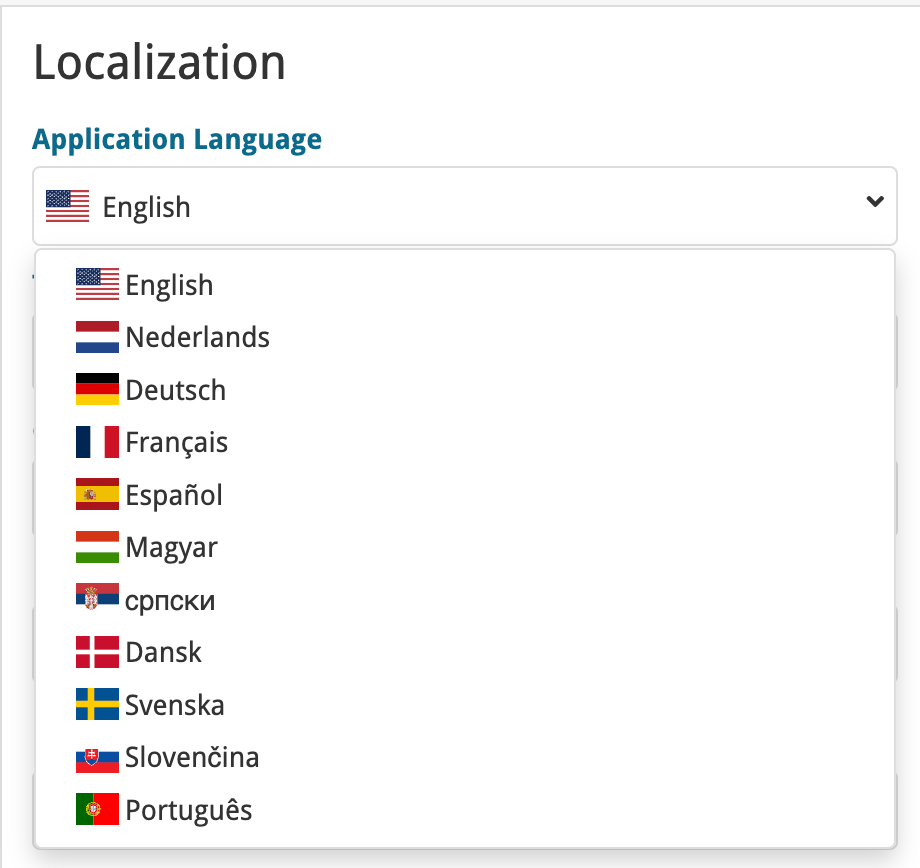
Thanks to our translator Peter Stickler, the Connect web-based software is now available in Swedish!
If you are interested in translating Connect to your language, let us know!
The main translations we are looking for at the moment are:
- Norwegian
- Italian
Thanks to our translator Frank Silas Kesia Jensen, the Connect web-based software is now available in Danish!
If you are interested in translating Connect to your language, let us know!
The main translations we are looking for at the moment are:
- Norwegian
- Swedish
- Italian
 Here’s the latest results from our endeavour to improve the UI/UX of all Connect features and screens. Today, we made further improvements to both the “Manage Collections” tools and the new Edit Multiple tool.
 The Edit Multiple feature is an efficient tool for making changes to multiple (or all) of your database entries in one go. It has been part of the Connect web-based software for many years (since May 2015!). For the CLZ mobile apps, this “batch editing” ability was introduced much later, in July 2020.
However, when we did that, we were forced to completely re-design the feature’s user interface, to make it work well on the small phone screen. And a strange thing happened: the UI/UX we ended up with, turned out be much better than the original Edit Multiple design of the Connect web-based software and the Collector desktop software 🙂
So today, we are bringing that new Edit Multiple setup to the Connect web-based software!
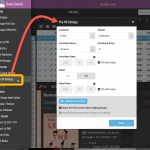
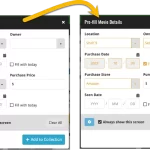 This update is all about the Pre-fill screen, you know, the screen that appears when adding items and lets you pre-fill fields while adding, like Location (= Storage Box for comics), Owner, Purchase Date/Store/Price, etc…
This Pre-fill screen was introduced in Dec 2020, with a fixed set of fields. Then a year later, in March 2022, it was made completely user configurable, so that *you* could choose which fields appeared on the screen.
This screen turned out to be a popular tool, but we’ve seen one problem with it:
Sometimes, users pre-fill a field for a specific movie (e.g. Purchase Price or Quantity), then forget to CLEAR it for the next items they add. Causing lots of items to be added with that same field set incorrectly.
So today, we are making another tweak to the Pre-fill screen:
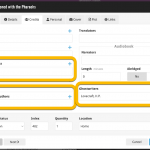
The Link with Core screen is a tool in the CLZ Cloud site and the Connect web-based software that is used to link entries with CLZ Core. E.g. items that you added manually, or items that you imported. The Link with Core tool is mostly used by users coming from other software and are switching to CLZ.
Today’s update is a “behind the scenes” update, to make the Link screen faster and to improve search results.
Improved
- The search now uses our elastic search engine, giving you better and more meaningful results for your unlinked items.
- Better uses of indexes and the elastic engine makes everything much faster too!
On top of that, we’ve improved the search results in the Link with Core screens for some Connect flavours specifically:
- Comic: Now takes series popularity into account.
- Movie: Now now also digs into our vast library of “alternative” and foreign titles for movies to obtain a result that matches your movie.
- Music: Now also uses Discogs for finding results.
What is Linking with Core?
Connect is built around our central online database: Core. All factual data and cover images are used and shown directly from Core. If you have been using the Add screen to catalog your items, then most, if not all of your items will already be linked to Core.
If you’ve added some items “manually” or if you’ve imported a list from CSV (or from somewhere else), there will not be a lot of data in them.
To automagically fill in data for your items, the items need to be linked with Core. If you have unlinked items, you can link them to Core using the Link with Core screen which is found in the menu top left!
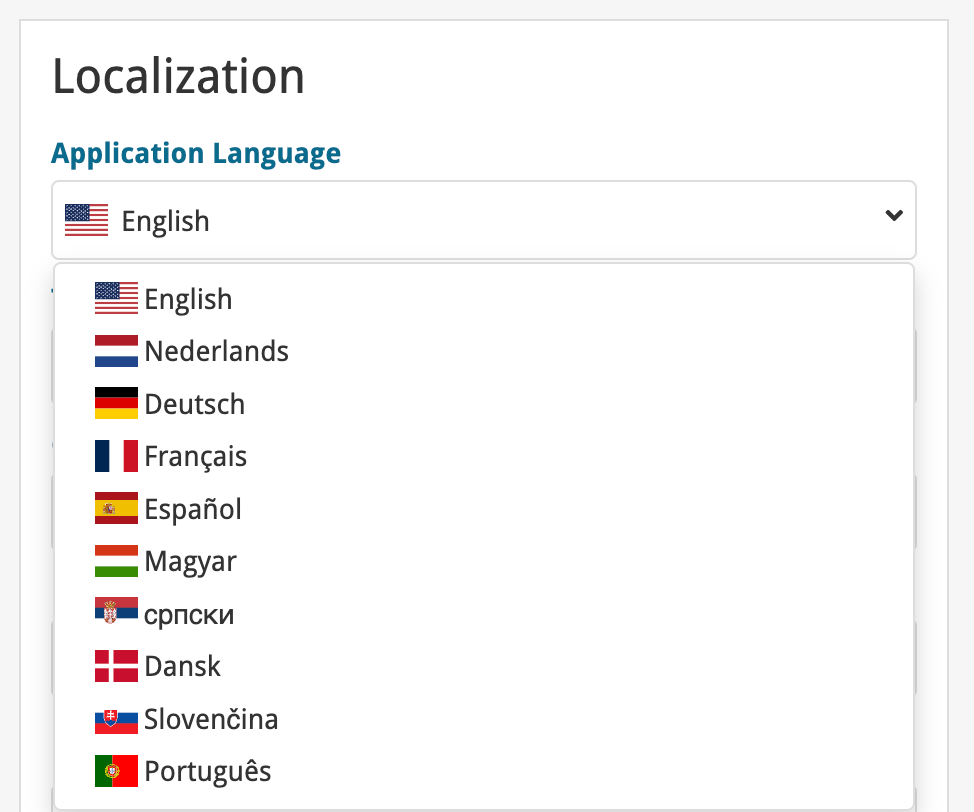
Earlier this year, we updated our Connect software to make it fully localizable / translatable. Shortly after, we went live with Dutch and German version of Connect.
Today, after the hard work of three loyal CLZ users, three more language options went live on the site:
- French
- Spanish
- Hungarian
Thank you, Philippe, Rafael and Pető!!
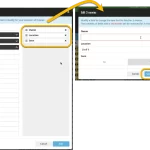
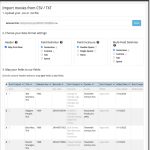 Continuing with our quest to revamp and re-design features and screen of the Connect web-based software. Today we took on the Import from CSV/TXT screen.
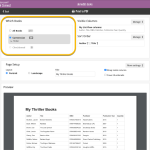 Connect and CLZ Cloud users often ask us about printing or exporting only a part of their collection, e.g. “how do I print just my wish list?” or “how do I export a list for just one author?”.
Now, this was possible, but it took a few steps that were not intuitive for many users. You had to:
- Make the selection in the main screen first, e.g. by using folders, the collection status filter or the search box
- Checkbox all books in the selection, using the checkboxes in the list
- Then use the Print or Export button on the special blue action toolbar above the list
With today’s update, we are making this a lot easier. And while we were at it, we also freshened up the user interface of the Print to PDF and Export to CSV screens.
 Great news for all our German-speaking customers: starting today the Connect web software is also available in German!
Our programmers have been working for months to make the Connect software available in other languages (other than English). This meant:
- Make the Connect software translatable, to ensure that all interface texts come from a translation database.
- Making a nice and easy translation tool for our translators, so that they can translate all texts efficiently and also maintain the translation when new functionality is added.
- And of course, to do the actual translation.
And today we can take the next step: Connect is now available in German!
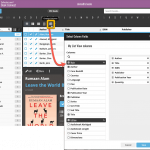
 A nice update for all Connect users who use multiple collections, especially for those who have a LOT of collections.
New in this re-design:
- Single row tab-bar. No more lost screen estate caused by multiple rows of tabs.
- Got more tabs than fit on screen? Scroll the bar horizontally.
- Or use the next/prev buttons on the right to jump page by page.
- Alternatively, click the menu icon on the bottom left to pick a collection from a menu.
- The menu also provides quick access to the Manage Collections screen.
- Drag tabs to change their order.
- Double click a tab to rename a collection.
 A big project our web-dev team has been focused on the past few months is making our Connect web-based software available into other languages. A huge project that consists of:
- Making the software translatable, basically ensuring that ALL UI text is retrieved from a translation database.
- Creating a nice and easy web-based CMS tool that translators can log in to and translate text, preview in Connect, etc…
- Doing the actual translations of all UI texts.
And today we can finally show the first results: Connect is now available in Dutch!
 Here it is, a big release of your Book Connect web-based software, in which we add SEVEN new data fields.
All fields were added based on feedback from you all, the users of the app.
Four of these fields were already available in the Book Collector desktop software and can now finally be synced through the CLZ Cloud to the CLZ Books mobile app (Cover Artist, Foreword Author, Ghostwriter and Box Set).
The other three fields are completely new to all 3 of our book cataloging solutions (Signed By, Dust Jacket and Number Line).
BTW: similar updates have also been released for the CLZ Books mobile apps and the Book Collector desktop software, so all 7 fields now nicely sync between all of them.
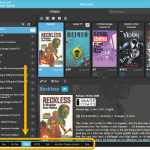
 Recently introduced in the CLZ mobile apps and instantly very popular, so now available in all five Connect flavors too: the Card View.
(And… because Connect already had a view called “Card View”, we renamed the old view to “Horizontal Cards” and named the new one “Vertical Cards” here.)
Here’s how to switch to new “Vertical Cards” view: on the toolbar above your collection list, click the 2nd button from the left, called “Vertical Cards”.
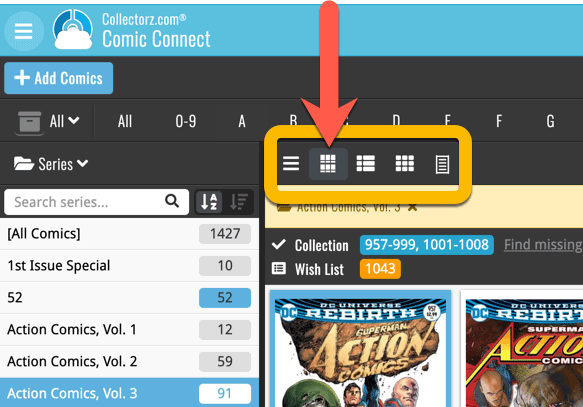
Check out the screenshots below:
 A big update for your Connect software today, with several cool new features and some smaller tweaks, all in one go:
- Easily add cover images by pasting into the Edit Screen’s Covers tab
- New Month and Date folder options for all date fields
- Improved Update from Core tool
- “Move to Other Collection” now possible from details panel toolbar
 One of the most popular features we added to the Book Connect software in the past few years is the Pre-fill screen. You know, the screen that pops up when adding new books from Core and lets you “pre-fill” some fields for the new additions, right there and then. Without having to go back and edit the entries afterwards. A big time-saver for most users.
The set of fields that is available on the Pre-fill screen has always been fixed, limited to Location, Owner, Purchase Date/Store/Price, Quantity and Tags.
However, after the release of this feature, we instantly started getting requests for more fields to be added to the Pre-fill screen. Which makes sense, I mean, if you always fill in a field that is not on the Pre-fill screen, you would have to “edit after adding” anyway, rendering the entire Pre-fill screen useless…
So today we are taking the Pre-fill feature to the next level by making the screen completely user-configurable. That is, to allow you to choose your own Pre-fill fields!
And while we were at it, we made some other related improvements. Here’s what’s new today:
- User-configurable Pre-fill screen: choose your own fields
- Pre-fill: new for Purchase Date and Reading Date: Fill with “Today”
- The Pre-fill screen is now also used to set field defaults
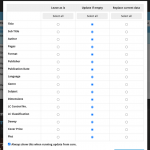
New “Add from Core” settings: select which fields you want to download from Core
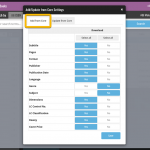 In today’s update we’re introducing new Add from Core settings screen, that lets you configure exactly which fields you want to download when adding new books.
While we are at it, we also tweaked the UI of the existing Update from Core settings and… we combined the two into ONE screens, with Add from Core / Update from Core tabs at top.
 A nice update for all five Connect flavors today, in which we’ve added new progress bars to all actions in the software that can take a while.
(In the past, the software would just show a rotating symbol, not giving you any indication of actual progress or how long it could still take.)
 We’re on a roll with the Connect development, so today we can release two new features for your Connect software:
- Search your collection by barcode, using CLZ Barry
- Set your CLZ Cloud Visibility per collection
Easier Columns & Sorting / remove Core covers / more Field Defaults
 We have finally been able to free up web-developer Stijn from several long running “back-end” projects, so he is making good progress on all kinds of smaller Book Connect improvements.
In today’s update, 3 nice additions / tweaks:
- Easier user interface for Columns and Sorting
- Remove/Restore the automatic Core images for Front and Back
- More fields available in Field Defaults
 Today, we have updated your Book Connect software for you, with two nice improvements in one go:
- Enhanced Collection Status filter, now including On Order, For Sale, etc..
- Update from Core tool now supports (way) more fields
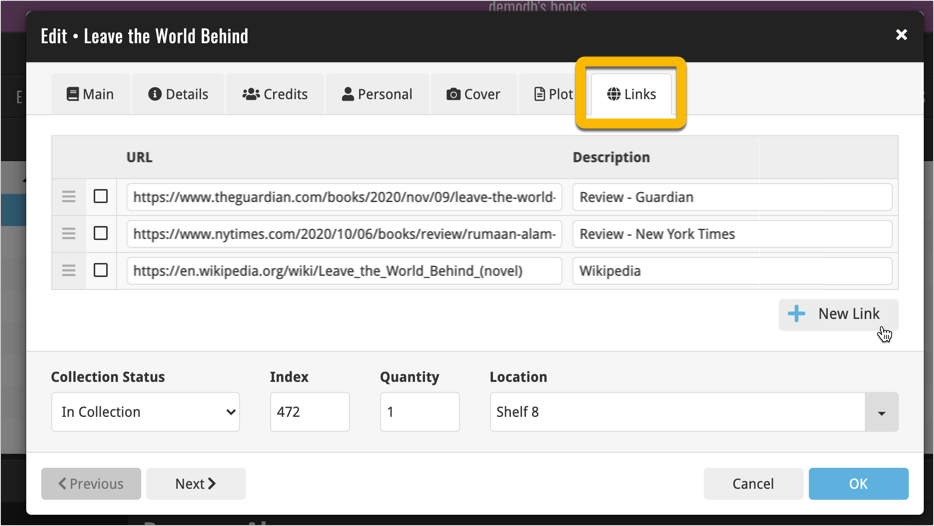
A huge update for your Book Connect software today, which gives you a LOT of new fields, plus the ability to add website links to your book entries!
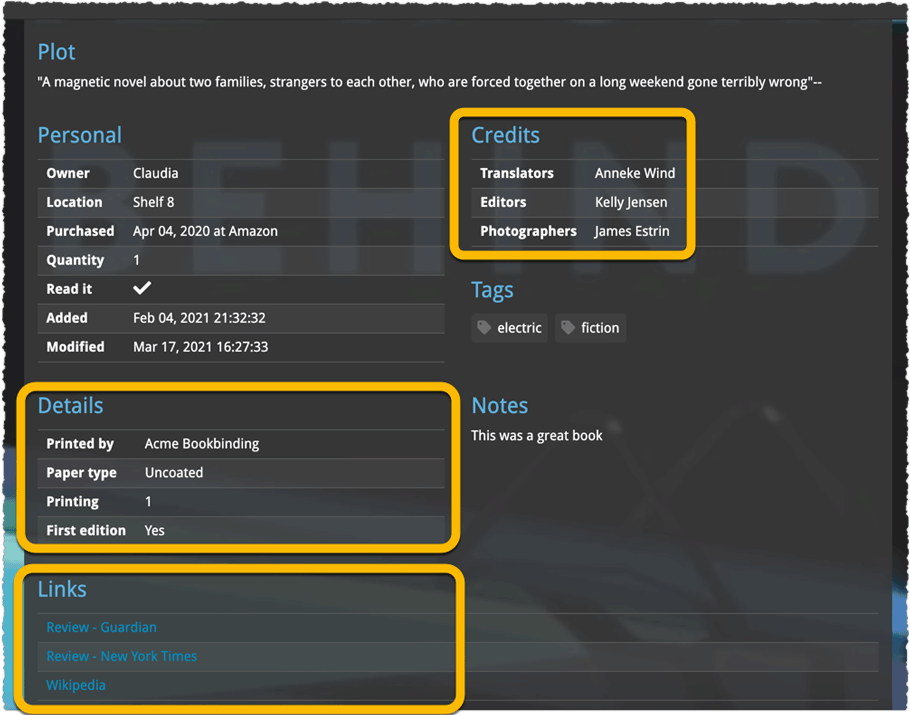
New fields on the details tab:
- Printed by
- Printing
- First Edition (yes/no)
- Paper type
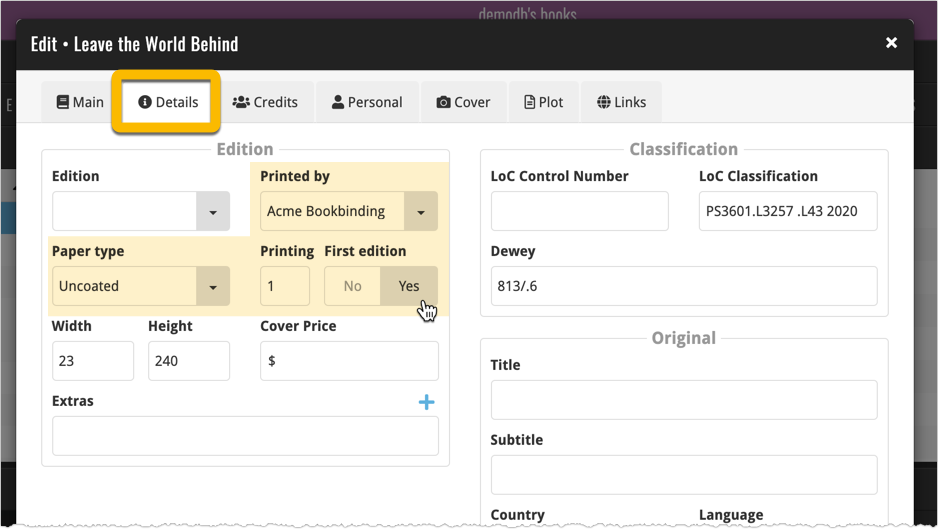
New fields on the new Credits tab:
- Photographers
- Editors
- Translators

New: add web-site links on the Links tab
Tip: paste a website link in the URL box and the description will be filled in automatically.
The new fields showing up in the Book Details panel:
With so many users switching from the desktop software to the Connect web-based software, we are getting a lot of useful feedback about the things they are missing, or would like to see in Connect.
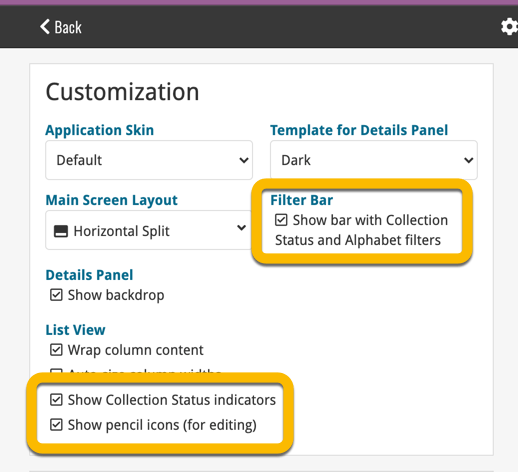
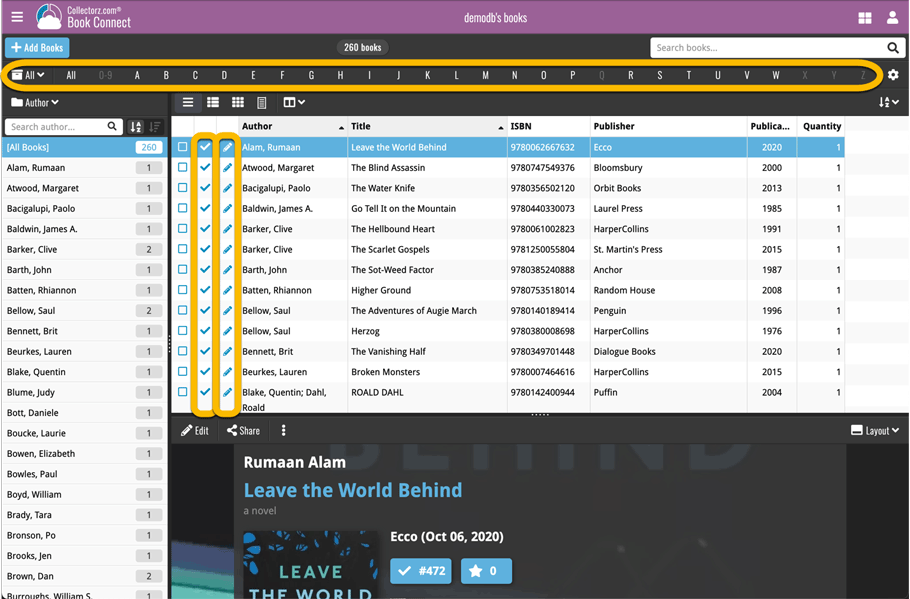
Today, a small update with 3 new settings to save screen space in the main screen:
- Show Filter Bar: uncheck this setting to hide the bar at the top with the Collection Status filter and the Alphabet Bar, giving you quite a bit more vertical screen space for your list.
- Show Collection Status indicators: uncheck this to remove the column with the status icons from your List View, giving you more horizontal room for your columns.
- Show pencil icons (for editing): uncheck this to remove the column with the pencil (edit) icons from your List View, again giving you more horizontal list space.
Oh and BTW: we also took this opportunity to complete re-think the layout of the Settings screen, to make the grouping of settings more logical. I recommend to take a good look again, maybe you will find some useful settings you never knew existed 🙂