
Contents
Adding or Removing a Column:
To add or remove a column, first access the Column Field Selection screen:
- Windows: Click on menu View > Columns > Select Column Fields
- Mac OS X: Click on menu View > Select Column Fields
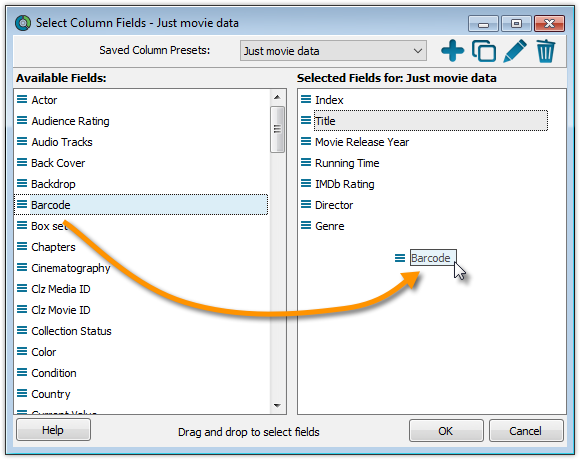
- This is the Select Column Fields screen.
- Fields available for use as Columns are shown on the left.
- Fields currently used as Columns are shown on the right.
You can click and drag from the section on the left to the Selected Columns area on the right. (or drag back fields you don’t want).
Changing the order of the columns
In the main screen in your list, you can change the order of your columns by clicking and dragging them left/right to another position:

Create/change a Saved Column Preset
You can switch between Saved Column Preset via the “Column” icon top right of your “List” panel in the main screen.
We added a couple you can check out. Click the “Column” icon and see which ones you can try.
You can also create your own:
- Windows: Click on menu View > Columns > Select Column Fields
- Mac OS X: Click on menu View > Select Column Fields
Create a new Saved Column Preset with the blue plus icon. Give it a name and click OK.
Now drag the fields you wish to use in this Saved Column Preset from the available fields on the left, to the right.
Need more help with this?
Don’t hesitate to contact us here.